So you’ve been hearing a lot about cloud data warehouses lately. Maybe it came up in a team chat. Maybe you saw it in a job ad and thought, “I should probably know what that is.” No stress. You’re in the right spot.
Today we’re diving into AWS Redshift. It’s Amazon’s go-to data warehouse for crunching huge volumes of data. But don’t worry, we’ll keep it simple. This is more “barbie with friends” than “corporate seminar with slides.”
Let’s get into it.
What Is AWS Redshift?
Imagine a massive virtual shed. But instead of rusty tools and a dodgy lawnmower, it’s filled with neatly stored data. That’s Redshift. It’s a cloud data warehouse that helps you run fast queries and reports on large datasets without breaking a sweat.
Want to know what your customers are buying the most? Curious about how sales went last quarter? Redshift is built for those questions and more.
On the tech side, Redshift lets you organise loads of data and run SQL queries to pull insights from it. The best bit? It’s fully managed. That means AWS handles all the backend grunt work—servers, patches, scaling. You just focus on the data.
Who Else Is in the Game?
Redshift has some strong competition. Here are a few familiar faces in the cloud data warehouse world:
- Google BigQuery: Great for scale and lightning-fast queries.
- Snowflake: Everyone’s darling for simplicity and cross-cloud options.
- Azure Synapse Analytics: Microsoft’s solution that plays nicely with its ecosystem.
They all have their perks. But today we’re sticking with Redshift.
Why Pick Redshift?
Let me give you a few solid reasons:
- Scalable: Your data grows? Redshift grows with you. Add more power in a few clicks.
- Fast: It’s built for speed. Big queries run fast and smooth.
- Cost-Friendly: You pay for what you use. Start small, scale up when you’re ready.
- Tightly Integrated: Works great with S3 for storage, QuickSight for dashboards, and the rest of the AWS toolbox.
Time to Get Practical: Set Up Redshift Serverless
Righto, enough theory. Let’s roll up our sleeves and set up a Redshift environment using the serverless option. The cool part? AWS gives you a $300 credit if you’re new to Redshift Serverless. Not bad for a bit of hands-on learning.
Step 1: Log Into AWS
Head to aws.amazon.com. If you’ve got an account, log in. If not, sign up. It’s quick. If you’re at work, use a sandbox account so you don’t mess with production stuff.
Step 2: Find Redshift
Once inside the AWS console, type “Redshift” into the search bar. Click the result and then choose Try Redshift Serverless.
This lets you create a data warehouse without fussing over clusters and nodes.
Step 3: Set Up Your Namespace
Now we’re getting to the fun part. With Redshift Serverless, you don’t have to stress about picking the right node type or setting up clusters. AWS takes care of all that behind the scenes.
You’ll be given two options:
- Customise settings
- Use default settings
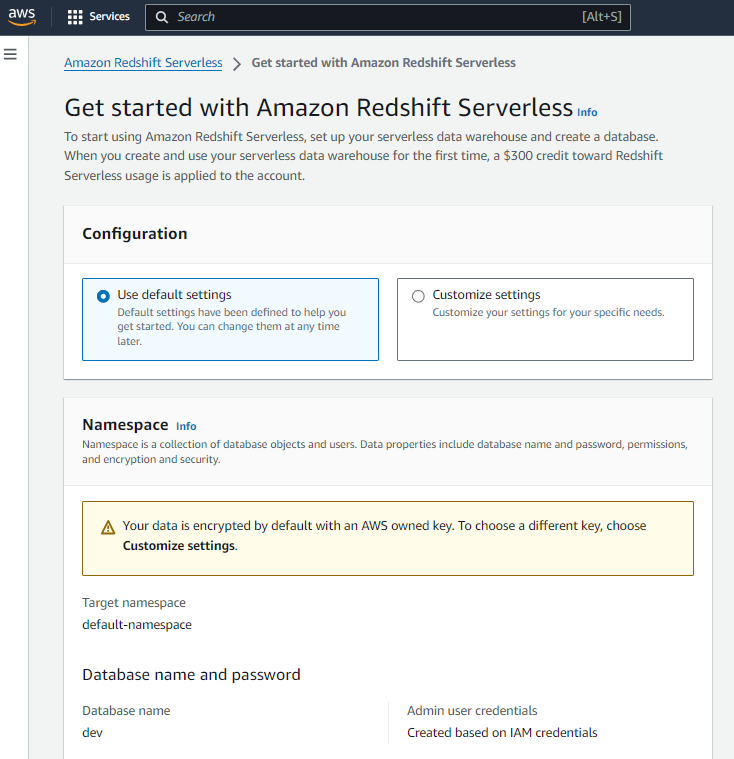
To keep things smooth and beginner friendly, go with Use default settings. This will create a namespace called default-namespace, and yep, you won’t be able to rename it later. But that’s fine for now. Let AWS do the heavy lifting while you focus on learning how it all works.
So what’s a namespace anyway?
Think of it as your own personal data command centre. It’s the space where your tables live, where your queries run, and where all the backend magic happens. No servers to manage, no complicated setup. Just a clean environment where you can get straight to work.
Imagine it like a high-end kitchen. You just show up, cook your data recipes, and when you’re done, AWS takes care of the dishes. Pretty sweet, right?
Next Up: A Few More Settings to Check
Alright, before we hit launch, there are a couple more quick things to sort out. Nothing complex. Just a few clicks and you’re good.
1. Database Name and Password
By default, Redshift Serverless will create a database named dev. If you picked the default settings earlier, you won’t be able to change this name. That’s totally fine for now.
As for the admin user, AWS sets that up automatically. No need to create one manually. The password is managed through your IAM permissions, so just make sure your AWS account has the right access.
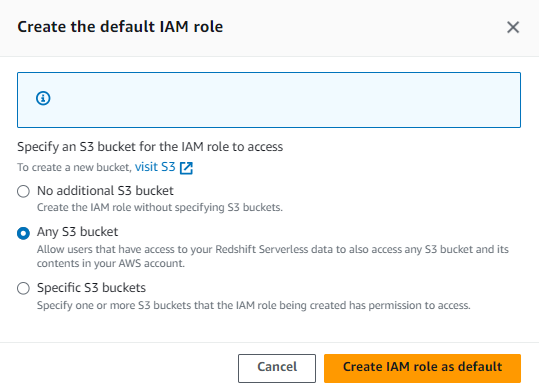
2. Associated IAM Roles
This part’s important. Your Redshift environment needs permission to talk to other AWS services—like S3 if you’re planning to load data from a bucket. That’s where IAM roles come in.
- Create or Choose an IAM Role: You’ll see a section called Associated IAM roles. If you don’t have one ready, just click Create IAM role. AWS will walk you through it.
- Permissions: Make sure the role has the
AmazonRedshiftAllCommandsFullAccesspolicy. That gives Redshift everything it needs to do its job properly. - Attach the Role: Once you’ve got the role, select it and set it as the default for your namespace.

Why Does This Matter?
Think of the IAM role as giving your data warehouse a master key. Without it, Redshift can’t open the doors to your S3 buckets or other services. With it, everything just works—data flows smoothly, and you don’t get blocked by pesky permission errors.
3. Set Up Your Workgroup
Now let’s sort out the workgroup part. If your namespace is like the kitchen, the workgroup is the stove. It’s where the heavy-duty processing happens.
This is where Redshift figures out how much muscle to use when you run your queries.
Here’s what to do:
- Workgroup Name: It’ll show up as
default-workgroup. No need to change it. Just let it be. - Capacity: You’ll start with 128 RPUs. That’s plenty for testing things out and running basic queries. If you ever need more power later, you can bump it up.
- Network and Security: AWS sets this up for you. It picks a VPC, subnets, and security groups to keep your environment safe. Unless you’re doing something specific with networking, leave these settings alone.
You don’t need to tweak anything here. Just hit Save Configuration and you’re good to go.
4. Launch Your Redshift Serverless Environment
Alright, once you’ve finished setting up your namespace and workgroup, hit Continue.
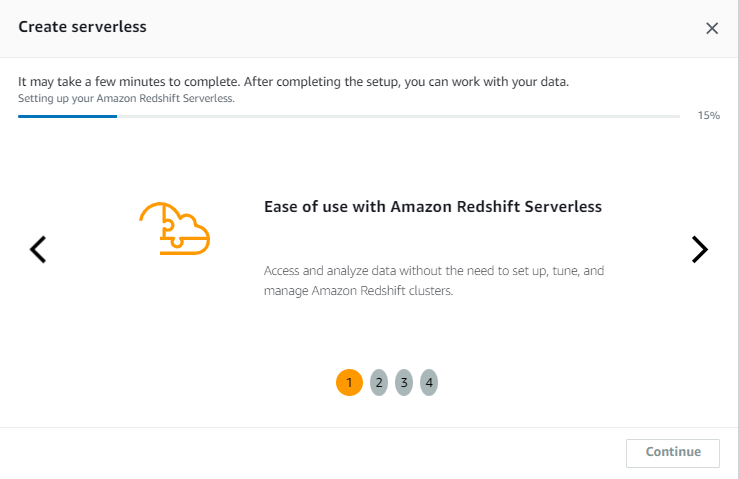
Redshift Serverless will get to work spinning up your environment. It usually takes a couple of minutes, so feel free to stretch your legs or grab a cuppa while it does its thing.
Now here’s the cool part, there’s no old-school cluster to manage. No need to pick node types or size anything. Redshift Serverless runs everything behind the scenes using your namespace and workgroup.
Once it’s up and running, you’re ready to start querying, loading data, and doing some proper data engineering.
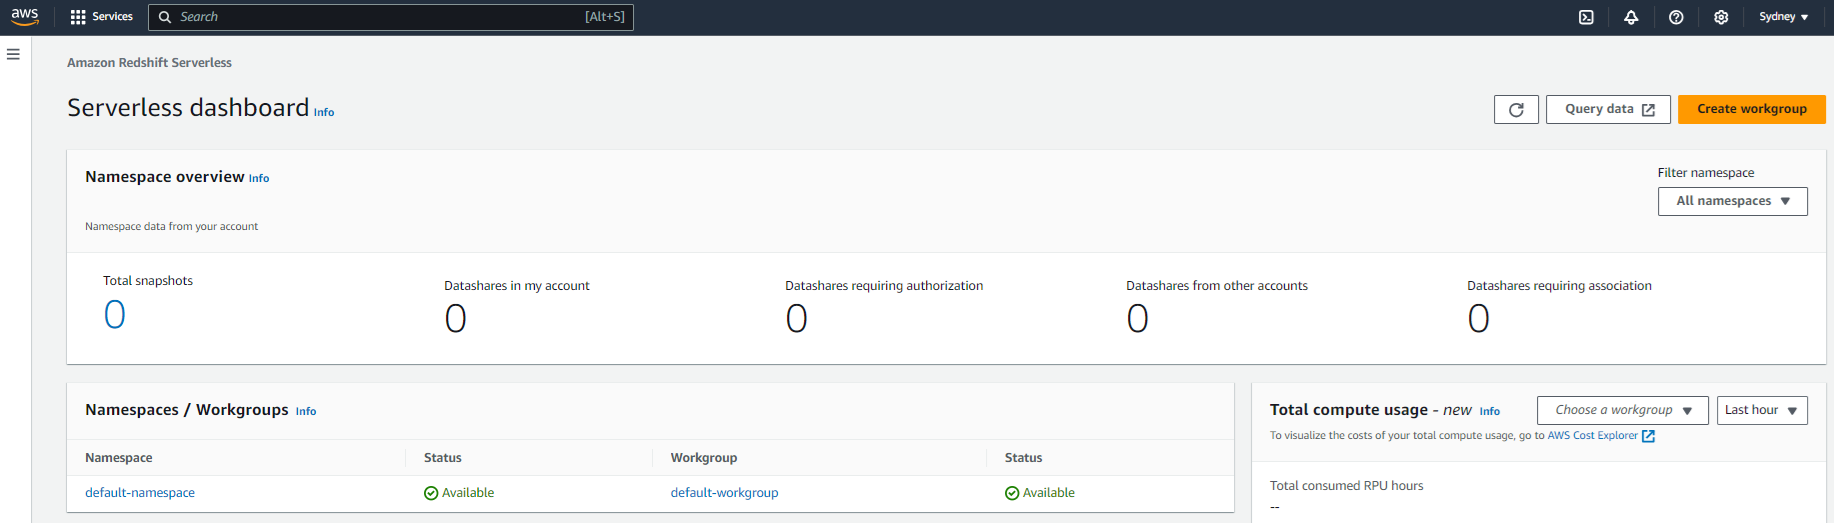
5. Connect to Your Namespace
Once your Redshift Serverless environment is live, it’s time to jump in and connect.
The easiest way? Use the Query data option, also known as Query Editor v2, right from the Redshift console. It runs in your browser, so there’s no need to install anything. But if you’re more comfortable using tools like SQL Workbench or pgAdmin, that’s totally fine too.
Here’s how to connect using the built-in Query Editor:
- Head over to your Redshift namespace details
- Click Query data
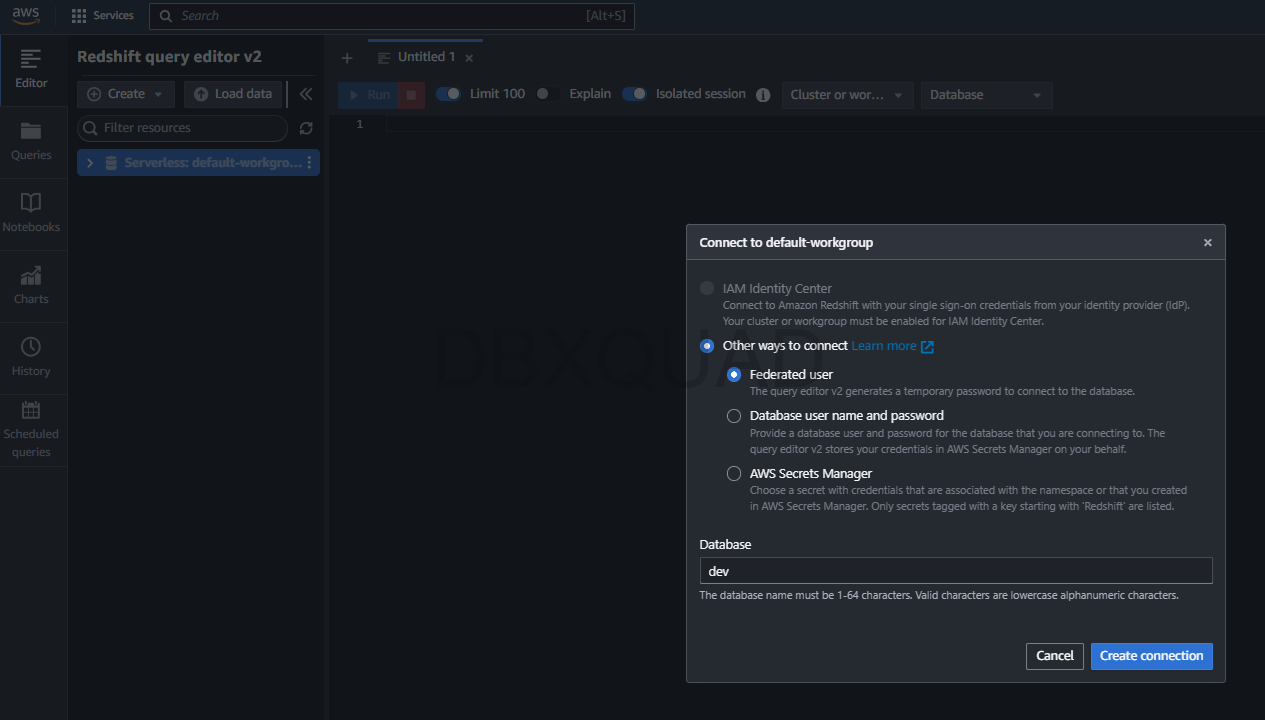
- On the left, you’ll see something like Serverless: default-workgroup — click that
- A pop-up will show up called Connect to default-workgroup, and the
devdatabase will already be selected - Hit Create connection and you’re in
6. Create a Table and Load Some Data
Now that you’re connected to the dev database, let’s create an empty table to hold the data from our CSV file:
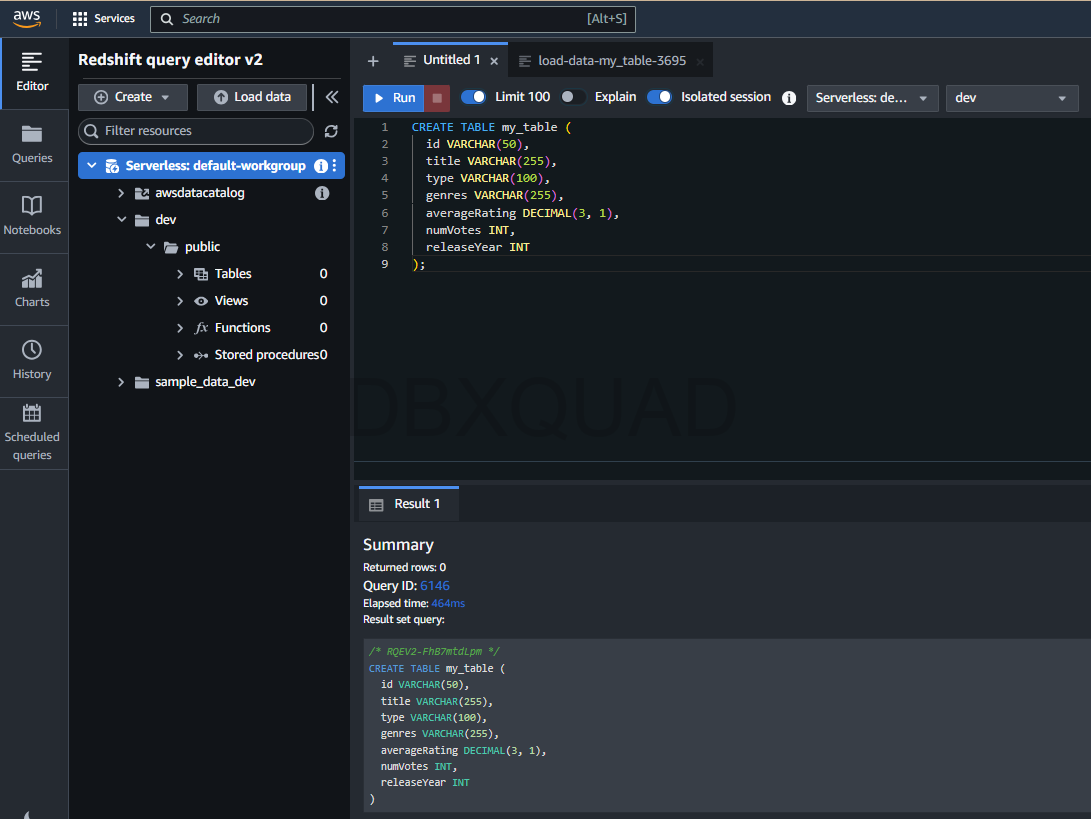
- Create a Table: Use the following SQL command to create a table:
CREATE TABLE my_table (
  id VARCHAR(50),
  title VARCHAR(255),
  type VARCHAR(100),
  genres VARCHAR(255),
  averageRating DECIMAL(3, 1),
  numVotes INT,
  releaseYear INT
);
This schema is designed to align with the structure of the IMDB dataset, with appropriate data types for each column.
Now that we have a table ready, let’s load some data! We’ll be using a CSV file from Kaggle, and you’re free to create a Kaggle account or use a dataset we’ve prepared to make your life easier. You can find the dataset here: IMDB Full Dataset. Redshift Serverless can pull data directly from AWS S3, so once you have the CSV, you can easily copy it into Redshift.
- Upload your CSV file to an S3 bucket.
- Use the
COPYcommand to load the data into Redshift. Here’s an example command:
COPY my_table
FROM 's3://my-bucket-name/my-file.csv'
IAM_ROLE 'arn:aws:iam::your-iam-role'
FORMAT AS CSV
DELIMITER ','
QUOTE '"'
IGNOREHEADER 1;
Just replace my_table, my-bucket-name, and your-iam-role with your actual details.
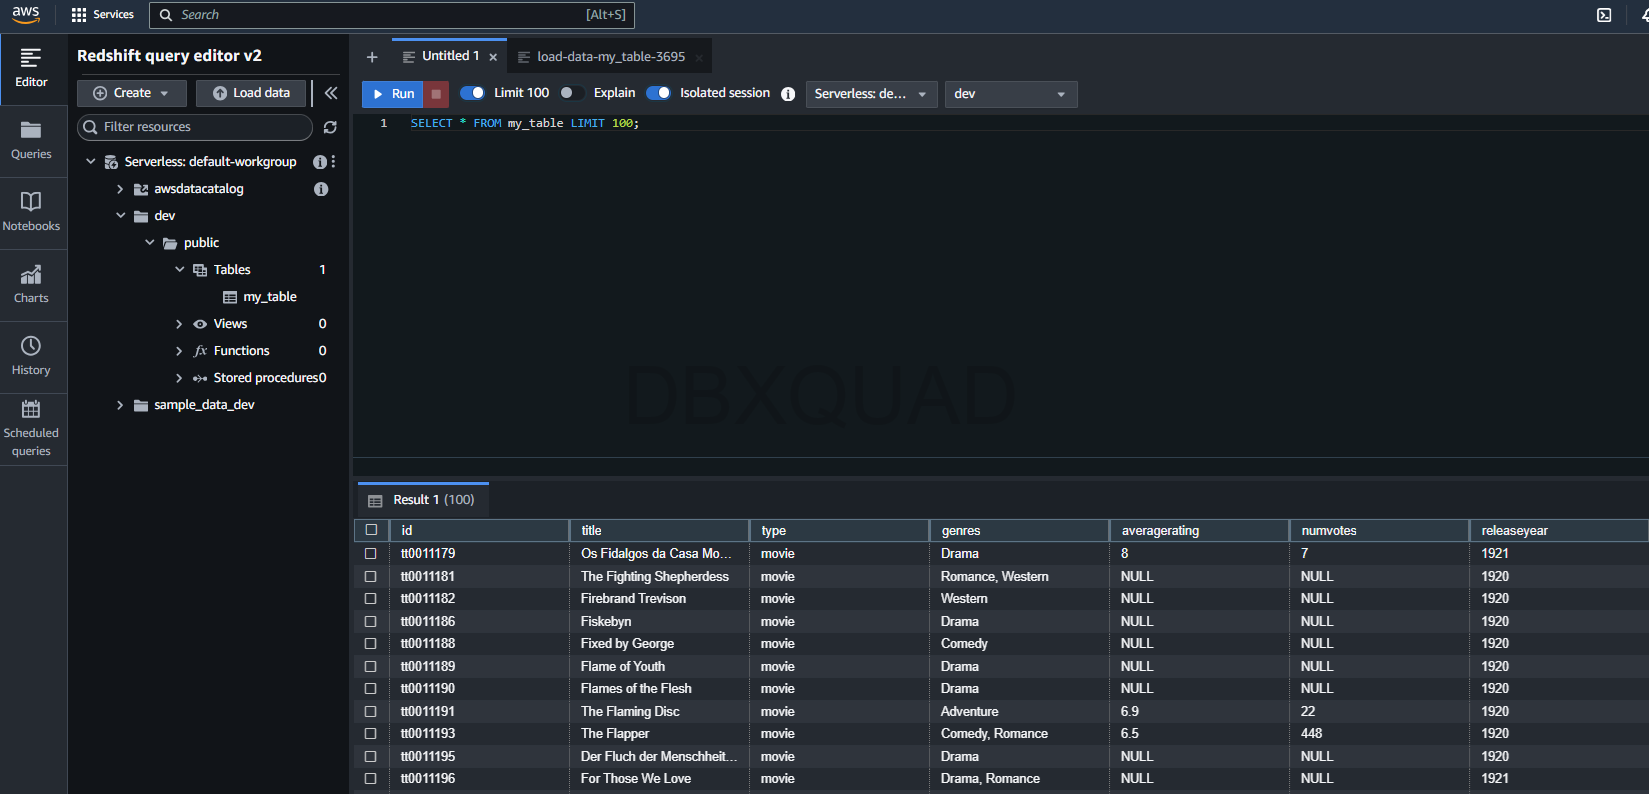
7. Run Some Queries
With data in your table, you can now run some basic queries. Try something like:
SELECT * FROM my_table LIMIT 100;This will show you the first hundred rows of your data, kind of like a sneak peek to make sure everything looks alright. The Query Editor v2 makes it easy to run queries and see your results instantly.
Quick Tip: Avoid Unnecessary Charges
Alright, before you walk away feeling like a Redshift pro, there’s one last thing to keep in mind.
Even though Redshift Serverless scales on its own, you can still rack up charges if you leave your environment running. So once you’re done exploring, it’s a smart move to shut things down.
Here’s what to do:
- Head to the AWS Redshift console
- Delete both the namespace and the workgroup
That’s it. Doing this will make sure you’re not paying for resources you’re not using anymore. Simple and safe.g.
Wrapping Up
And there you go. You just spun up your very first Redshift Serverless workspace, loaded in some data, and ran a few queries like a seasoned analytics engineer.
Redshift Serverless is a solid tool. It’s built for scale, it’s quick, and it’s surprisingly beginner-friendly. Whether you’re working solo or at a big company, if you’ve got data and questions, Redshift is more than ready to help you find the answers.
So go on, pat yourself on the back. You’ve taken the first real step into cloud data warehousing.
Now close your laptop, relax, and celebrate 🎉